When it comes to planning a trip to the Cairngorms National Park, the biggest challenge is its size.
There’s a whopping 4,500sq kilometres of it. To put that into perspective for you, Greater London (i.e. the city proper, and all the suburbs that sit within the M25) is 1,583sq kilometres. Luxembourg, at 2,586sq kilometres, could almost fit into the Cairngorms National Park twice.
There’s so much to see, and that makes it hard to choose which parts to see and which to save for a subsequent trip. After much deliberation, we opted to spend the first half of our trip in the area around Cairn Gorm itself, and the latter half around Braemar.
Spending the night at Rothiemurchus Camp & Caravan Site (as opposed to driving up in the morning from Edinburgh) gave us a head start in the morning, and meant we had plenty of daylight hours to play with. We parked the car at Cairngorm Mountain car park, logged details of our route via the QR code at the Ranger Station, and set off – back down the road. (Sounds strange? Well, our starting point was dictated by the fact we could leave the car at Cairngorm Mountain for multiple nights – this isn’t the case for most other car parks in the area, which are are pay and display.)
We peeled off onto a small dirt track shortly after the fork in the road, and followed this down to the Sugar Bowl car park. Roughly opposite the car park, a narrow path disappeared into the trees. Already, we were grateful for some shade; it was stonking hot for most of our trip, and large swathes of the Cairngorms National Park are exposed plateaus. We soon reached a little wooden footbridge, where we stopped for a moment to take in the view.
Onwards and upwards: Chalamain Gap – and the four Munros beyond it – beckoned. Chalamain Gap is a Marmite element of this route. If you love clambering over boulders, it’ll be right up your street. If not, a hefty detour via Rothiemurchus Lodge would allow you to bypass it.
I’ll be the first to admit that had it been wet and slippery to navigate, I probably wouldn’t have enjoyed it quite so much. Fortunately for us, it was (at that point in the day, at any rate) dry and sunny and it didn’t take us too long to reach the top. We then meandered across the hillside for a kilometre or so, before dropping down into the Lairig Ghru.
We found some stepping stones to cross the stream, and then headed up the other side of the valley towards Sròn na Lairige. Up on the ridgeline, it was blowy and noticeably cooler than it had been when we set off. Stomachs rumbling, we found a sheltered(ish) spot and stopped for lunch.
Our first Munro of the day was now within striking distance. We continued along the path, passing East Gully and then Black Pinnacle on our journey to the summit. At 1,296m, Braeriach is the third-highest peak in the British Isles. It’s the wilder, less-visited cousin of Ben Nevis and nearby Ben Macdui – I don’t recall seeing anyone else at the summit – and it’s all the better for it.
On a clear day, Braeriach offers stellar views of Lochan Uaine (pictured below) and Sgòr an Lochain Uaine (The Angel’s Peak). Tempting as it was to take a longer break at the summit, we were acutely aware of the many kilometres we still had to cover.
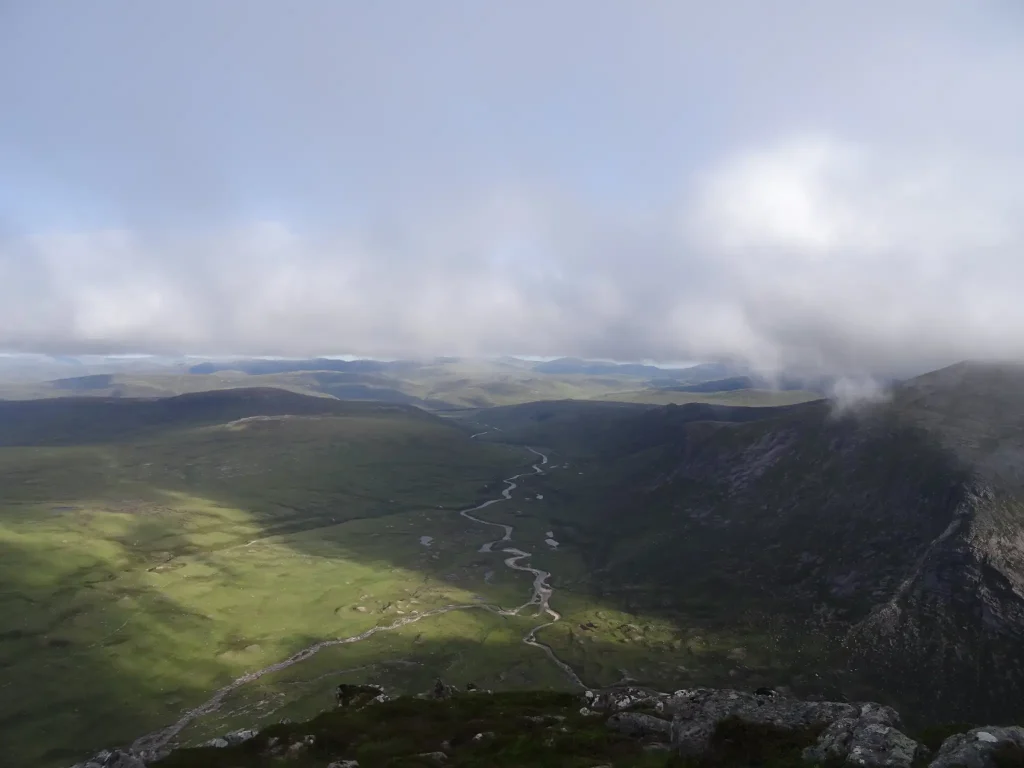
Our route took us past the Wells of Dee, a series of pools which together form the source of the River Dee (which then flows across Aberdeenshire before entering the North Sea in Aberdeen). The River Dee – little more than a stream here – meandered towards the edge of the plateau, where it disappeared from sight; at the Falls of Dee, it would tumble over the edge of the cliff and make its descent to the valley floor.
Every so often, ‘does what it says on the tin’ features such as East Gully, West Gully and Great Gully would be interspersed with more imaginative ones, such as the Indiana Jones-esque Sphinx Ridge. Around this point on our walk, we realised that although it looked as though once we were up, we were up, there was in fact still a fair amount of up-down-up-down between the four Munros scattered along the plateau.
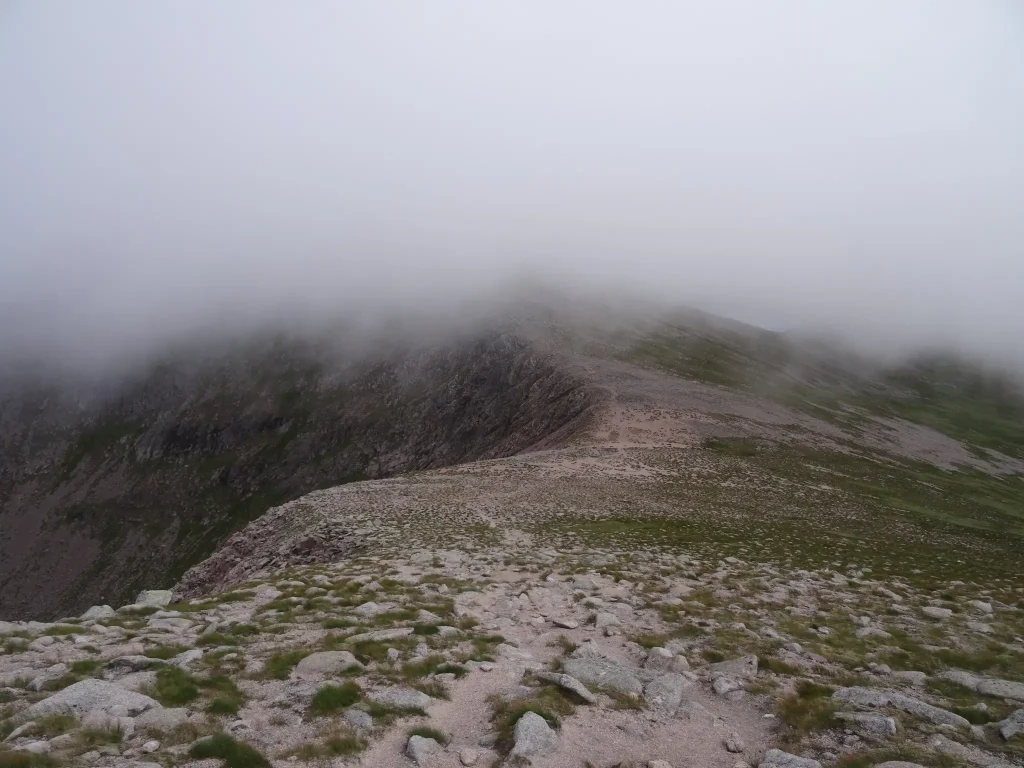
Case in point: the stretch from Sgòr an Lochain Uaine (our second Munro of the day, at 1,258m) to Cairn Toul (our third Munro of the day, at 1,291m, and the fourth-highest peak in the British Isles). On the map, the path hugs the edge of a very steep cliff and looks reasonably straightforward and well-marked. In reality, the cloud descended and the path – well, I’ll leave you to form your own judgement from the photo below.

Needless to say, we didn’t fancy walking that close to the edge when the visibility was edging towards zilch. We opted for a more laborious (and at times, admittedly somewhat tedious) ascent over the boulders so that we were safely away from the edge. When we reached the top, feeling damp and tired, we were rewarded with a view of thick, grey cloud. On the upside, there was a small stone shelter for a much-needed snack break.
If going up Cairn Toul felt hard, going down felt harder. There was no clear path to follow, only piles of boulders – some stable, others a wee bit wobbly – to navigate. We bumped into another walker at Stob Coire an t-Saighdeir. When he reassured us the visibility was better ahead and there was a clear path, our relief was tangible. (Unfortunately, we couldn’t be quite so positive about what lay ahead for him: lots of cloud, and no discernible path.)
Already feeling in brighter spirits, we pressed on towards our final Munro for the day: The Devil’s Point. The path to it was punctuated by excited oohs each time one of us spotted a toad in the long grass – and dubious looks when we spotted a tent pitched on the boggy-looking ground ahead of us. Sure enough, by the time we reached The Devil’s Point (1,004m) the clouds had lifted to reveal Glen Dee in all its splendour.

We didn’t linger for too long at the top, as by now it was early evening and fairly cool. We retraced our footsteps to Coire Odhar, and headed down the path beside Allt a’Choire Odhair.
We’d originally planned to continue through the Forest of Mar and camp by Bob Scott’s Bothy that night, but by a stroke of good fortune a get-out clause sat conveniently at the foot of The Devil’s Point in the form of Corrour Bothy. We decided there and then that we’d call it a day at Corrour Bothy. There was little point in walking further that evening, as it was past eight o’ clock and we were – to put it bluntly – pretty worn out.
By this point in the evening, there were a fair number of tents scattered around the bothy. We claimed one of the last fairly flat patches and set about pitching the tent. Out of curiosity, we poked our heads inside the bothy. It was cosy and spartan: a couple of raised wooden platforms on which to sleep, a few chairs and a fireplace. We spent a while chatting to a trail runner who had been out for the day with his dog, before heading back over to our tent to make tea (the meal, not the drink) and hit the sack.
KNOW BEFORE YOU GO
- Parking | There’s a suggested donation of £2/day at the Cairngorm Mountain car park. Pay at the café (if open) or drop some coins in the donation boxes dotted around the car park.
- Maps and guides | Arm yourself with a copy of OS Explorer OL57 before setting off on this route.
- Distance | 25.6km/16 miles; 1,440m of elevation gain
- Camping | Finding a campsite near Aviemore that took bookings for a single night proved a bit of a challenge. Rothiemurchus Camp & Caravan Park did the job, but it was on the pricy side as far as campsites go at £15pp per night (in July 2021). Check www.rothiemurchus.net for the most up-to-date opening hours and tariffs.
- Misc.| Log details of your route via the QR card next to the Ranger Station before you set off – and don’t forget to check back in when you return.